Sunday, September 26, 2010

Pinto bean & cocoa chili

Yes, you read that correctly. Bean and cocoa chili. The cocoa adds just a hint of bitterness, and a sublime rich flavour. This is my new favorite chili, hands down.


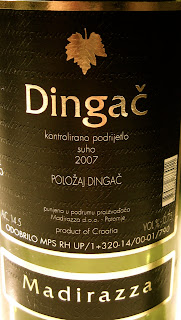
Our guests brought a spectacular Croatian wine straight from the Madirazza winery -- a red which complemented the chili perfectly. I usually go for a cold beer with a spicy meal, but this wine was the perfect accompaniment: deep, strong and full of late-season flavours.

What you need (6-8 servings):
  • pinto beans, cooked from dry (2 heaping cups) with bacon
  • 1 can chopped tomatoes
  • dollop olive oil
  • 1 large onion, chopped
  • 3-4 garlic cloves, chopped
  • 2 bell peppers or yellow paprikas, chopped
  • 1 tsp ground cumin
  • 1 tsp oregano
  • 1/4 tsp ground black pepper
  • cayenne pepper, hot paprika and/or chili powder to taste (last night, we used just under 1/2 tsp cayenne pepper, and the chili was pleasantly but not overwhelmingly spicy)
  • ~ 2 tsp unsweetened cocoa
What you do:
  • Cook up the pinto beans, initially covering them with 1 inch of water.
  • Near the end of the bean cooking time, heat the olive oil in a skillet. Over medium-low heat, cook the onions and garlic until translucent. Once the beans are finished, add the onions and garlic to the bean pot (do not drain the beans!). Over low-ish heat, get the bean pot simmering gently.
  • Add the tomatoes and bell pepper, and stir well. Add all spices and adjust to taste.
  • Stir the cocoa into a small amount of hot water, then add to the chili. Stir well. Taste again and add more spice if needed.
  • Let simmer gently for 20-30 minutes, to let the flavours blend. 
  • Serve with cornbread and rice!

Thursday, September 23, 2010

Smoked salmon. Figs. Cream cheese.


Sometimes a simple dinner is best. Richard had a late meeting last night, and I had cinnamon roll dough covering every bit of counter space. The oven was in use, and I didn't feel like putting together a complicated dinner. And so: Wasa bread, cream cheese, organic Norwegian smoked salmon, red onion and fresh figs. We also had homemade bread with a cheese course. Oh joy. This was heavenly. The crunch of the Wasa, the silkiness of the cream cheese and the intense flavor of the salmon -- together with the sharpness of the red onion. 

Budapest has been putting its very best autumn face on: we've had four days of sun and warmth, with crisp air and leaves crunching underfoot. It's such a welcome relief from the rain and gloomy skies which this city does so well. And it's terrific for bird watching: recently, we've been out to the Hortobagy National Park, to Lake Velence (and nearby marshes), and to the Vacratot botanical gardens. Purple herons, great white egrets, nuthatches, lapwings, buzzards, and stonechats galore!

No recipe today -- it's as simple as it sounds. But I'm trying something new with chili tonight (pinto beans and cocoa powder) and, if it works, it'll be up on the blog soon. [It had better work, since we are having guests over...]

Monday, September 20, 2010

Fried rice

I like my fried rice to be chock full of tastes and textures; the rice nearly fades into the background and allows the other ingredients to shine through. As well as the necessary rice, egg and onion, I use three key ingredients: edemame, shrimp and shiitake mushrooms. The result is a hot, filling and flavorful dish, with the crunch of the beans, the softness of the shrimp and the firmness of the shiitake. It is quick to make, and good for leftovers. This weekend, we took our extras to our farmstay near Hortobagy National Park. With a quick re-heat, the fried rice was the ideal meal to be eating inside a small cottage kitchen while listening to the pelting rain.


What you need (4 servings):
  • 1 cup rice, cooked (warm or cold)
  • olive or sunflower oil
  • 2-3 eggs, lightly beaten with a fork
  • scant cup frozen shelled edemame, defrosted (just run them under the tap for a couple of minutes)
  • scant cup salad shrimp (if they are frozen, let them sit in tap water for a couple of minutes)
  • 8 dried shiitake mushrooms
  • 1 tbsp soy sauce
  • 1 medium onion, diced
What you do:
  • Place the shiitake mushrooms in a small bowl and cover with hot tap water. Place clingfilm over the bowl and poke a couple of holes through it. Microwave for one minute. Let the shiitakes rest for at least 20 minutes. Then remove the stems from the mushrooms (keep them for making stock -- they can be frozen for this purpose) and sliced the shiitake caps into long, thin strips. Set aside.
  • Heat a small quantity of oil in a wok or frying pan. Once it is hot, pour in the lightly beaten eggs. Let cook without stirring for 20 seconds, then break apart and scramble with a wooden spoon. Once the eggs are set (no more than one minute), remove to a bowl.
  • At a tiny bit more oil to the pan, and heat over medium. Add the onion and cook, stirring, until translucent. Then add the edemame and shiitake, and cook until warmed through. Add the rice and soy sauce, stirring to break up clumps of rice. Once it is warmed through, add the shrimp and egg and stir to mix well. Serve piping hot!

Sunday, September 12, 2010

Roasted plums


These are fresh out of the oven -- steaming hot, goopy, waiting to be cooled slightly and poured over yoghurt. Or ice cream. Or eaten on their own.

We've been eating delicious Italian plums for nearly a week now, but the last bunch I bought weren't quite right: tart, and faintly green between the yellow flesh and purple skin. I doused them in honey and dark brown sugar, and roasted them in the oven until they began to fall apart. Rescuing the juice was a pain -- I didn't use the right size pan -- but the result is sweetness and the taste of warm plums. We've had them over plain yogurt at breakfast, and over vanilla ice cream for dessert. The only problem is that they are now all gone.

What you need:
  • plums
  • brown sugar (1 tbsp per pound of plums)*
  • honey (scant tbsp per pound of plums)*
  • plain yoghurt or vanilla ice cream, for serving
  • slivered almonds, for serving (optional)
*Use a bit less if your plums are completely ripe!

What you do:
  • Preheat oven to 425 F.
  • Cut the plums in halves and discard the pits. Place the plums, brown sugar and honey in a bowl and stir well. Spread the plums in a single layer (more or less) in a Corningware dish (or glass baking dish) and place in oven for 10-15 minutes. Remove when plums are soft but not completely soupy.
  • Let cool until warm before serving.

The plums, with their juice, keep in the fridge for a couple of days.

Friday, September 10, 2010

Rack of lamb


Traveling in New Zealand last winter (well, it was summer there), we had some truly fabulous lamb -- including as part of our cabin-cooked New Year's Eve meal near Abel Tasman National Park. But then, we were in the hands of experts: good friends, one Canadian and one French, who are posted to Auckland. They are also fully responsible for our ability to cook mussels. And polenta. And ham. Oh, dear.

We finally bought a rack of lamb (New Zealand lamb, no less) from the British Pantry and worked up the courage to cook it. The result? It's easy. It's fun. And it is splendid -- splendid -- to eat. We served it with boiled potatoes (not exciting, I know, but simple), steamed bok choy (rare to find here, and excellent) and rosemary-garlic butter.

This is a fancy meal, and relatively expensive. But it's worth it for the taste, the look, and the wondrous smell of lamb, rosemary and butter.

Rack of lamb with rosemary-garlic butter


What you need (3-4 servings):
  • ~2 lb. rack of lamb, Frenched (get your butcher to French it for you -- home knives won't do the trick)
  • freshly ground black pepper
  • 2 garlic cloves, sliced thinly
  • 3-4 rosemary branches
  • 75 g butter
What you do:
  • Preheat oven to 425.
  • Heat an oven-proof skillet over high heat. Meanwhile, season the rack with pepper.
  • Turn heat to medium-heat and sear the rack: place it meat-side down in the dry (do not add any fat) skillet for 2 minutes, and then turn it over for 2 more minutes. 
  • Pour off any fat from the skillet, and place in the oven. Roast for 15 minutes. Here is where the size of your rack matters: for a 2-lb rack, 15 minutes is perfect. For larger racks, up to 20 or 25 minutes will be needed. We had a 1.7 lb rack, and 12 minutes gave us rare-medium lamb.
  • Meanwhile, melt the butter over medium-low heat. Once melted, add the garlic slices and the rosemary branches. Simmer very gently as the lamb cooks.
  • Once lamb is done, remove from oven and let sit for 5 minutes before slicing.
  • Remove the rosemary from the butter, and serve the rack 3-4 ribs per person with butter poured overtop.

Wednesday, September 8, 2010

Chicken with pears, leeks and orange juice


This recipe affords us the opportunity to use our large Wilton stoneware casserole, which guarantees that it looks stunning on the table. Tim and Diane's pottery shop, housed in a mid-19th century limestone school house, is one of my favorite places to visit when I go home. The chicken itself is equally stunning: slowly baked with pear, leeks and orange juice, it is juicy and sweet and altogether satisfying. As Sassy Radish's original recipe notes, it's also deceivingly simple to make -- hence why we chose it for our last large dinner party.

This chicken is best served with rice (preferably brown or three-grain), which serves to soak up the juices, and a simple salad. I should add that it does not reheat that well, so I recommend adjusting the recipe to make enough for a single meal. We've made it for two with great success.

What you need (3-4 servings):
  • 6 chicken legs and/or thighs
  • 2 pears, cut lengthwise into eighths (don't worry if the pears aren't ripe; they will soften and sweeten during the cooking)
  • 1 leek, thinly sliced (white part only)
  • 4 spring onions, diced (white part only) (or other small onions)
  • 3 cloves garlic, minced
  • orange juice (at most 1 cup)
  • 1/4 cup olive oil
  • sea salt and freshly ground black pepper
What you do:
  • Preheat oven to 400°F.
  • Place chicken in a Corningware or other baking dish just large enough to hold all the chicken in a single layer. Cover with the pear, leek, onion and garlic. Pour over the olive oil and enough orange juice to coat the bottom of the pan (for a 9x11" dish, you will need it least half a cup). Season with salt and pepper.
  • Bake for 20 minutes. Turn chicken over and bake for another 20-30 minutes, until completely cooked. If it looks dry when you turn it over, add more orange juice. Serve with its sauce.

And -- because I can't resist -- the sun setting behind the hill, from our balcony:

Pinto beans


This is not the world's greatest photo -- I was much more interested in eating these beans than in finding my tripod. By the time we sat down to dinner, the kitchen had been full of heavenly smells for most of the afternoon. It has turned cold here in Budapest (overnight lows of 5°C and daytime highs of 15°C), and we are slowly moving from our summer repertoire of salads and cold meals to our winter repertoire of beans, soups and stews. 

These pinto beans are cooked with (us? vegetarian? not for years!) bacon, which renders them indescribably thick and tasty. You can leave as much liquid as you want in the pot, and serve these as a soup or as beans on their own. 

(The biscuits in the photo? They are Pioneer Woman's bacon-cheddar-onion biscuits. Don't make them. You'll never want to eat anything else again.)

Pinto beans

What you need (3-4 servings):
  • 2 cups dried pinto beans
  • 2-3 slices of bacon, cut into 1 inch squares
  • salt and freshly ground black pepper, to taste
  • sour cream (optional)
What you do:
  • Rinse the beans under cold water, picking out any small stones. Place the beans in a large, heavy pot and cover with 1-2 inches of cold water. Add the bacon. Over medium-high heat, bring to a boil, and then simmer (covered) for ~2 hours (or until the beans are just soft). During the cooking time, stir occasionally and add water if the water level falls below the bean level.
  • Once the beans are cooked, add salt and black pepper to taste. I usually add a pinch of salt and 1 tsp black pepper.
  • Serve with sour cream (optional) and some sort of biscuit or bread.

Sunday, September 5, 2010

Black olive tapinade


We've been making this black olive tapinade as a nibbly for guests for ages, and have recently started making it just for the two of us, once in a while, if dinner is far off and we are peckish. It's very simple, and extremely satisfying. You can make it as savory, sweet or salty as you like, and as chunky or smooth as you like. It goes with bread, crackers and toasts (or, if you find yourself home alone, just dig in with a spoon).

What you need (~ 1 cup):
  • 1 cup pitted black olives
  • dash olive oil
  • 1-2 cloves garlic
  • 1 tbsp capers (optional)
  • dash salt*

* Only add salt if you are serving the tapinade with bread. If you are serving it with salted crackers (such as the terribly good Carr's cheese table water crackers shown above), you do not need to salt the tapinade.

What you do:
  • Place all ingredients in a mini-blender, and blend until it reaches your desired consistency. Add just enough olive oil to make it pleasantly spreadable.

Friday, September 3, 2010

Chickpea salad


Ever since moving to Budapest, we've been cooking our beans from scratch (except, admittedly, when needing to make a bean salad as part of a 20-person barbecue...). It's easy, it's versatile and it adds a tremendous amount of flavor to the beans. Garlic, all manner of spices, bay leaves, bacon, and some vegetables can be used -- anything, essentially, which is not acidic. Tomatoes and the like will prevent the beans from softening.

Chickpeas are one of the simplest beans to cook, since it's nearly impossible to overcook them. This chickpea salad has quickly become a favorite of ours for dinners, packed lunches and even airplanes snacks. Cooked with bay leaves, tossed in an olive oil-balsamic-Dijon dressing, and mixed with some red onion and garlic, it can be made as sharp or as mild as you like. The salad can also be combined with a variety of vegetables -- cucumber, red pepper and tomato being my favorites.

The most common complaint I hear about cooking beans from scratch is that it takes a very long time. It doesn't. It takes, at most, a couple of hours. You do not need to soak beans overnight. You do not need to spend all whole day coaxing them along. You just need one to three hours (depending on the type of bean), during which time you only need to be in the kitchen for a total of 15 minutes. And -- it will bring the most beautiful smell into your kitchen. It's worth it.

Chickpea salad

What you need (4-ish servings):
  • 1 heaping cup dry chickpeas, picked over and rinsed
  • 2 bay leaves
  • 1-2 cloves garlic, minced
  • 1/2 red onion, minced
  • olive oil
  • balsamic vinegar (be sure to use good quality balsamic)
  • Dijon mustard
  • 1 cucumber and/or 1 red bell pepper and/or 2 tomatoes
What you do:
  • Place the chick peas in a large pot, and cover with 2-3 inches of water. Add the bay leaves. Bring to a boil over medium-high heat, then reduce heat to low and simmer for 1-1.5 hours, stirring occasionally. Add more hot water if the water level falls below the chickpea level (don't forget -- if there isn't enough water in the pot, the chickpeas won't soften). The chickpeas are finished when they are soft, but still have bite. I recommend checking them after one hour, and every 10 minutes afterwards until they are done. Depending on the humidity and temperature in my kitchen, mine usually take between 1 hour and 1 hour 20 minutes. Drain, remove bay leaves and set the chickpeas aside in a large bowl. Allow to cool to room temperature (or slightly warmer).
  • Use the olive oil, balsamic vinegar and Dijon mustard to make a dressing. I don't like too much dressing, so I typically use 2 tbsp olive oil, a couple of drops of balsamic and a heaping 1/2 tsp mustard.
  • Mix the minced garlic and red onion with the chickpeas, and then stir in the dressing.
  • Before serving, mix with cucumber/red pepper/tomato. The salad can be served on its own or over lettuce.